How to Break Down Gameplay Capture Footage
How do you take several hours of messy game footage and pare it down to several minutes of carefully selected clips you can use to make your trailer? I have two articles about breaking down visuals and breaking down dialogue, which I recommend looking at first. This post will specifically address game-specific tips for breaking down footage. I've used this process hundreds of times and it's served me well no matter what genre of game.
I play through and capture as much of the game as possible when I start work on a gameplay trailer. I try to keep my clips relatively short so the file sizes don't get too unwieldy. For example, if the game is separated into levels (e.g. Viewfinder, Tactical Breach Wizards, or Desta: The Memories Between), each clip will only have one level. Even if a game isn't explicitly separated into levels, I'll still break up the files so none are longer than a handful of minutes. If there are no explicit levels I might break clips up once I see color palettes are shifting significantly, or I just finished a big combat encounter or story beat.
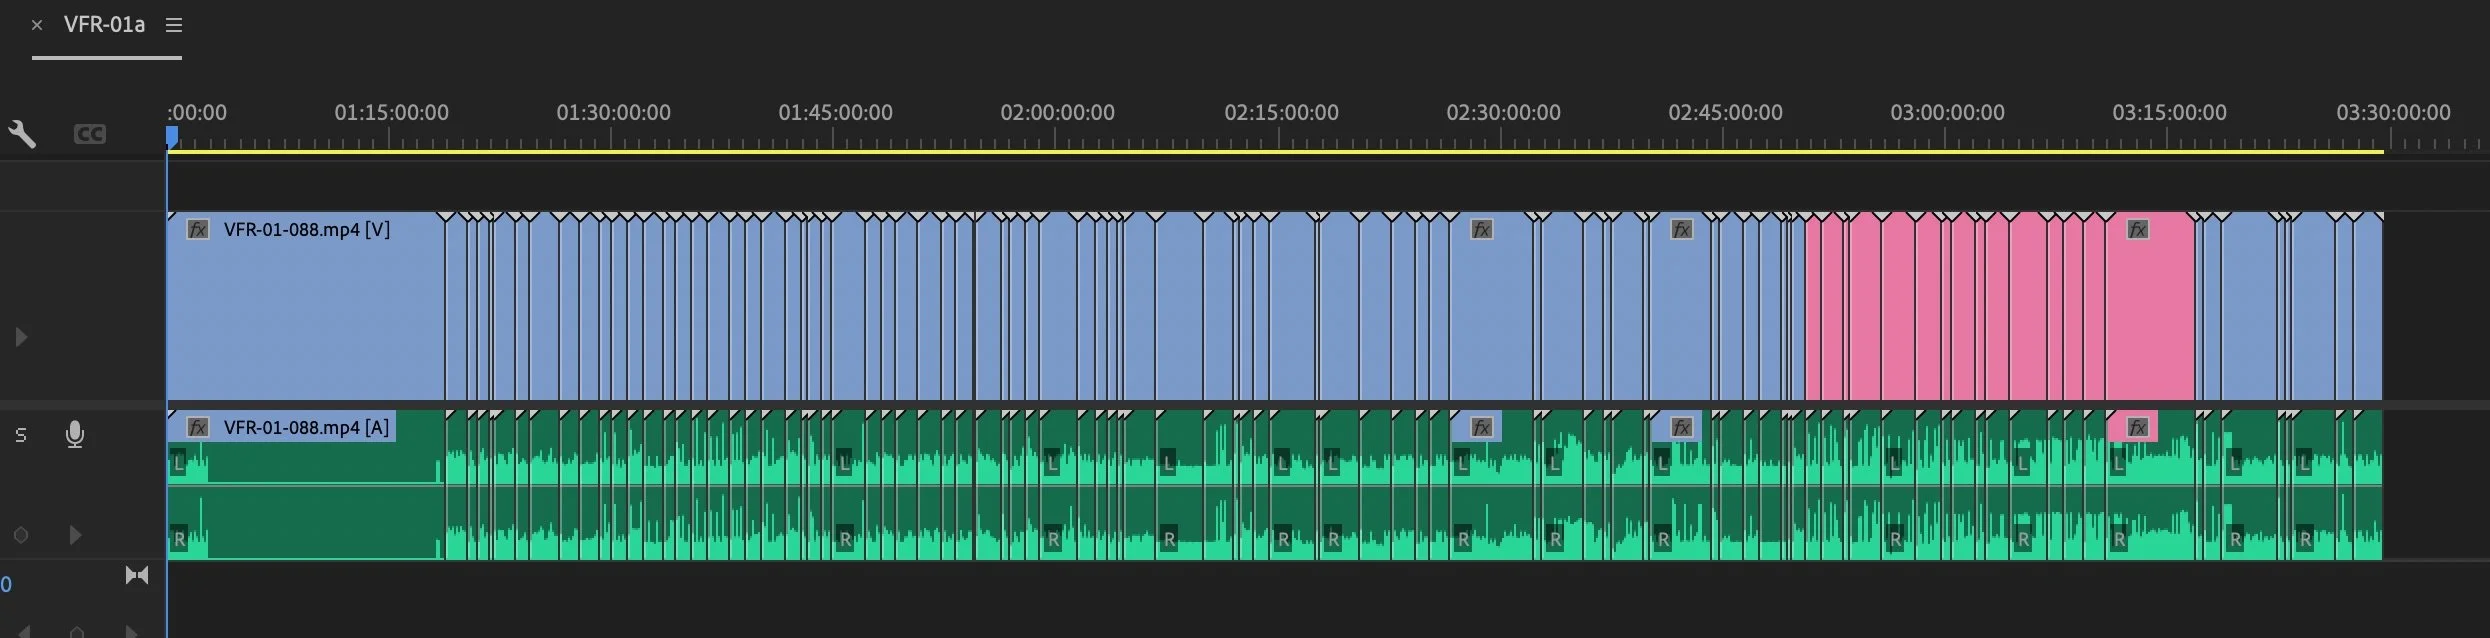
More than two hours of footage from my first capture session for Viewfinder
After I've captured a bunch of footage, I use the file renaming software (A Better File Rename) to assign each clip a three letter project name, followed by a number for the build, sequential numbers, and a brief descriptor.
For example: VFR-01-001-FIRSTCAPTURE
This is for [Viewfinder]-[Build Number]-[Filenumber]-[Descriptor]
The build number isn't the actual build number, I just start at 01 and then when I receive a new build I'll start files again at 02. This is so I know how old each clip is. Build [01] might have a ton of placeholder graphics in it, so when I'm finishing a trailer I'll want to make sure the final version only has footage from the newest build (unless the art has not been significantly changed)
If I'm being REALLY diligent, the descriptor will be specific to something like VFR-02-005-TELESCOPE. But I usually don't add those until I'm in the re-capturing phase. The first round of clips are just something like "FIRSTCAPTURE" because at that stage of my process is isn't quite as important to know what's in each clip, and the clips might span many different things.
It's time too break down the footage once it's all captured and imported into my Premiere Pro project. This process has four benefits.
It makes me rewatch all the footage
It reinforces my familiarity with the game
It removes the bad footage
It organizes the good footage to speed up my editing
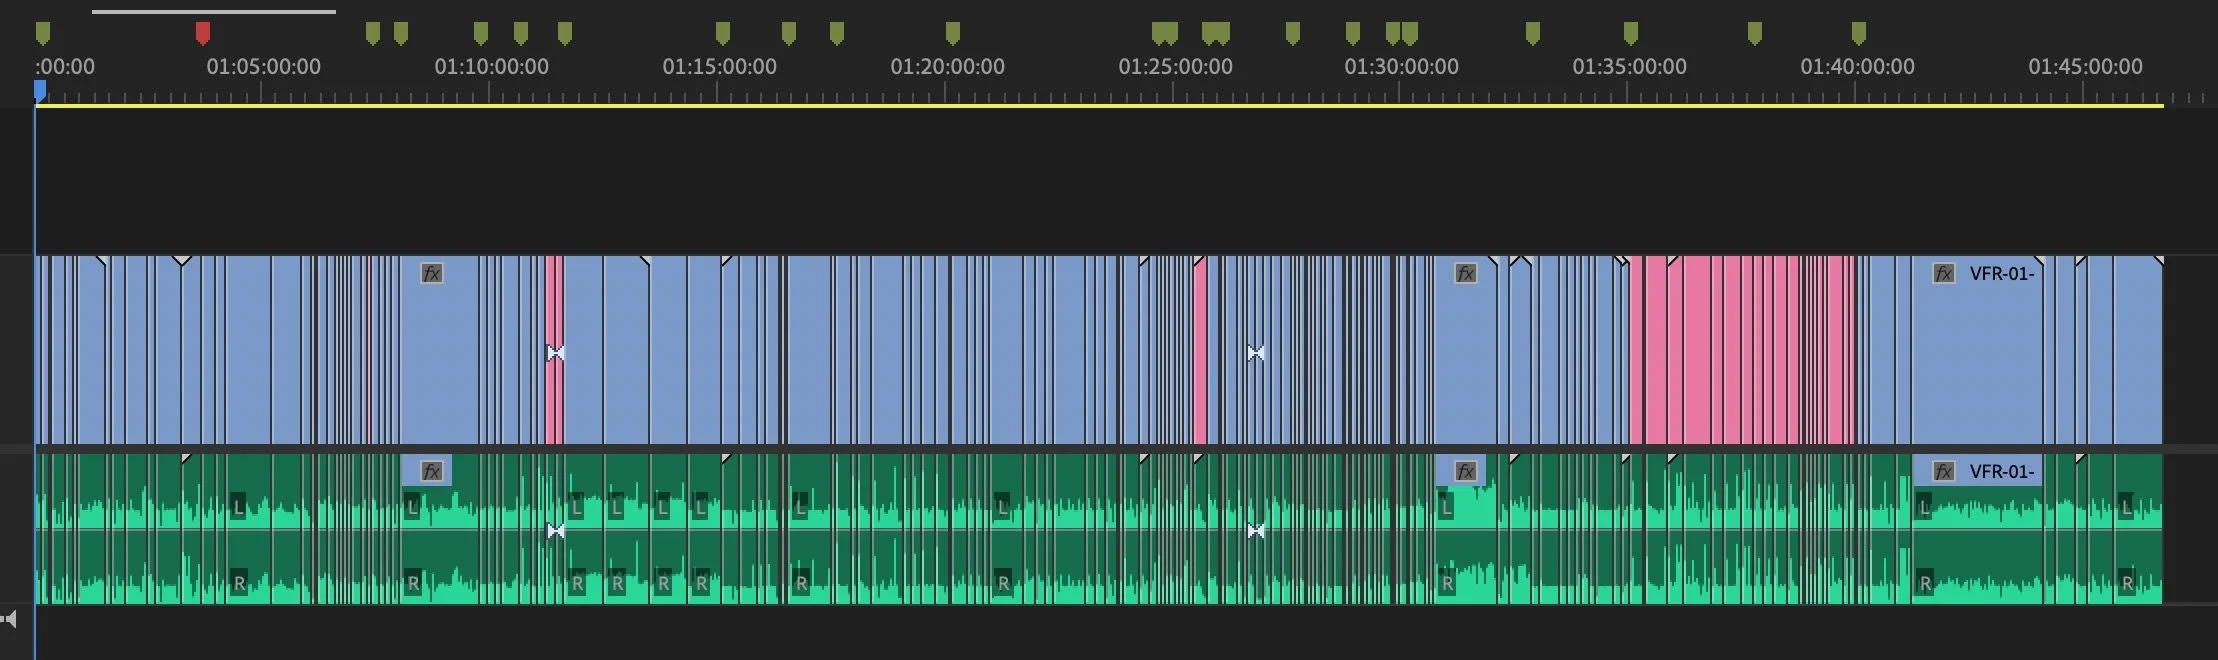
Two hours down to about 45 minutes of footage (still a ways to go)
The biggest difference between breaking down game and movie footage is due to the information the audience needs from the trailer. Both movie and game trailers should tell a story, but games specifically need to:
Show how the player interacts with the game
Show/explain the core game loop
Show a variety of color palettes and environments to hint at the game's scope and keep the trailer visually fresh.
Sum up the experience the player can expect from the game
I usually break down the footage in two passes: First I go through all the footage selecting dialogue, then I do it all over again for visuals. I do this because it's simpler for me to focus on one thing at a time. When breaking down for dialogue I pretty much follow the process in my old blog post, but there are some game-specific categories I'll sort into that I wouldn't need to if I was working on a movie trailer.
The additional category I add to my dialogue breakdown is "GAMEPLAY." These are lines of dialogue which in some way either explicitly or implicitly are referring to something the player does. For example, a line like: "Every clue I find gets me closer to the answer" could be cut to gameplay where the player finds an object in a locked safe which they use to open a door or unlock a puzzle. There's also often dialogue which is much more explicit like: "If you want to find the antidote, you're gonna have to search through those drawers."
No matter how explicit the dialogue is, these lines of dialogue are worth saving in a separate section just in case I need to illustrate a core gameplay idea and want to use the game itself to explain it rather than a title card or narrator's voice I add in (though sometimes the in-game dialogue alone isn't enough for maximum clarity)
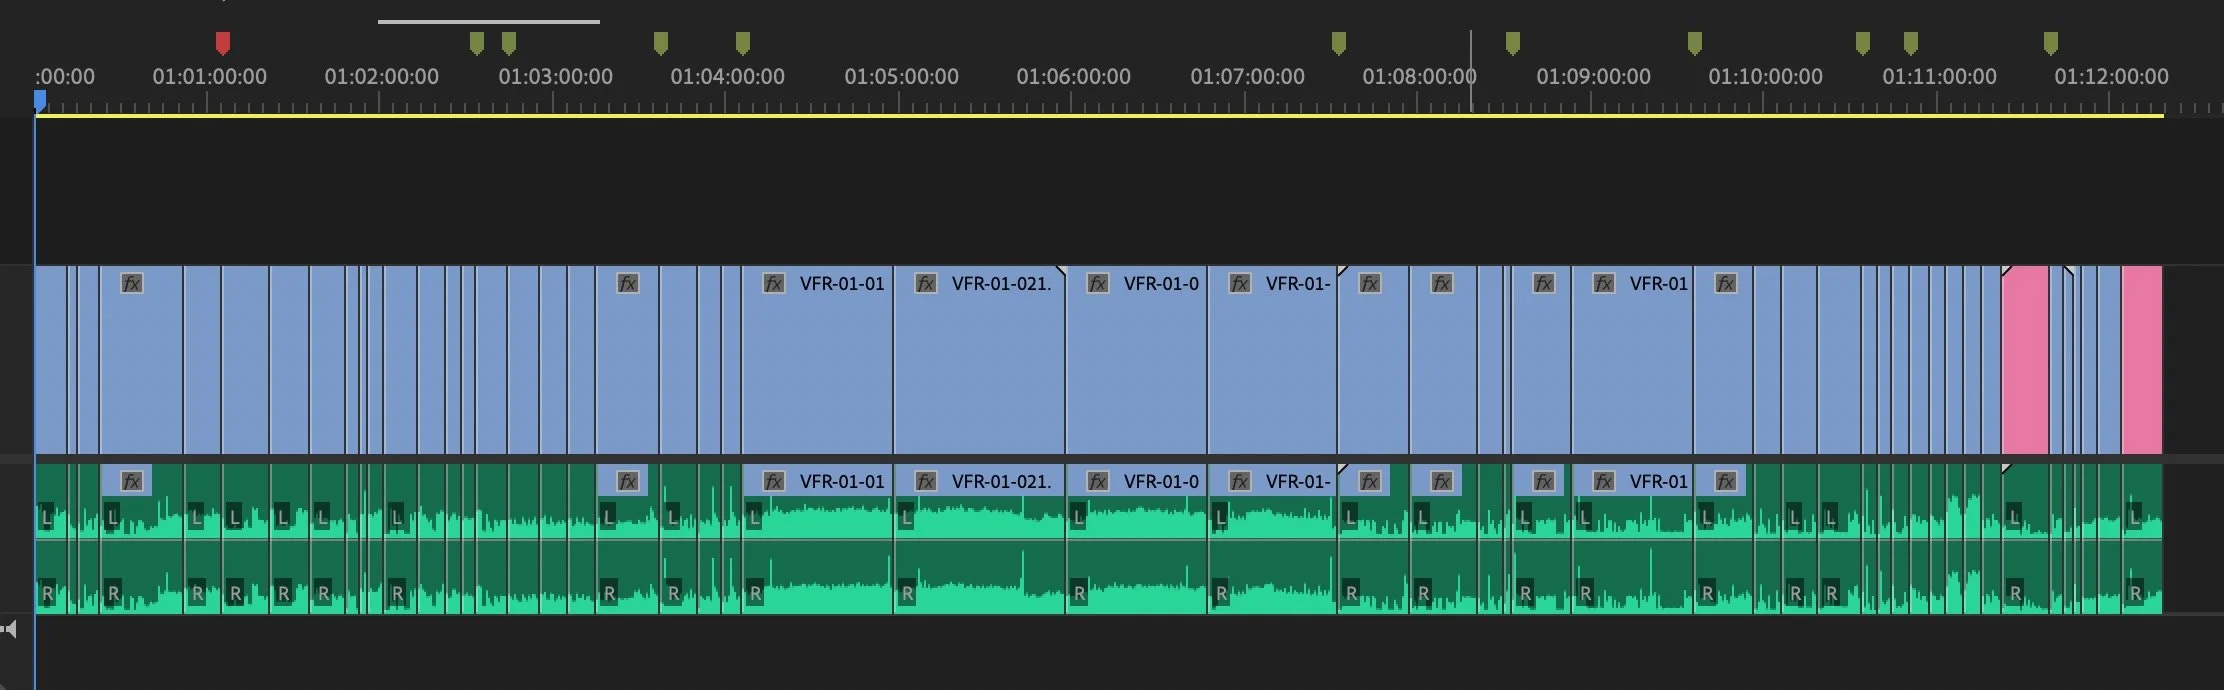
Here is about 12 minutes of footage which were the most standout moments that I felt should go into the trailer.
Breaking down visuals is the most different between games and movies, especially if the game has a lot of mechanics and room for player expression. The categories I break gameplay visuals into depend on the game. For example, for a life-sim like Ooblets I'd have categories like:
Farming
Ooblets
NPCs
Levels
Item pickups
Minigames
Dance Battles
Crafting
Decorating.
Whereas for a game like Viewfinder I sorted by mechanics like:
Static camera
Batteries
Photo flipping
Falling
Switches
Telephones
Hubs
Found Photos
Or a game with combat like Dead Cells I'd have categories like:
Biomes
Platforming
Metroidvania Unlocks
Swords
Daggers
Bow & Arrows
Magic
Traps
Bosses
Explosions
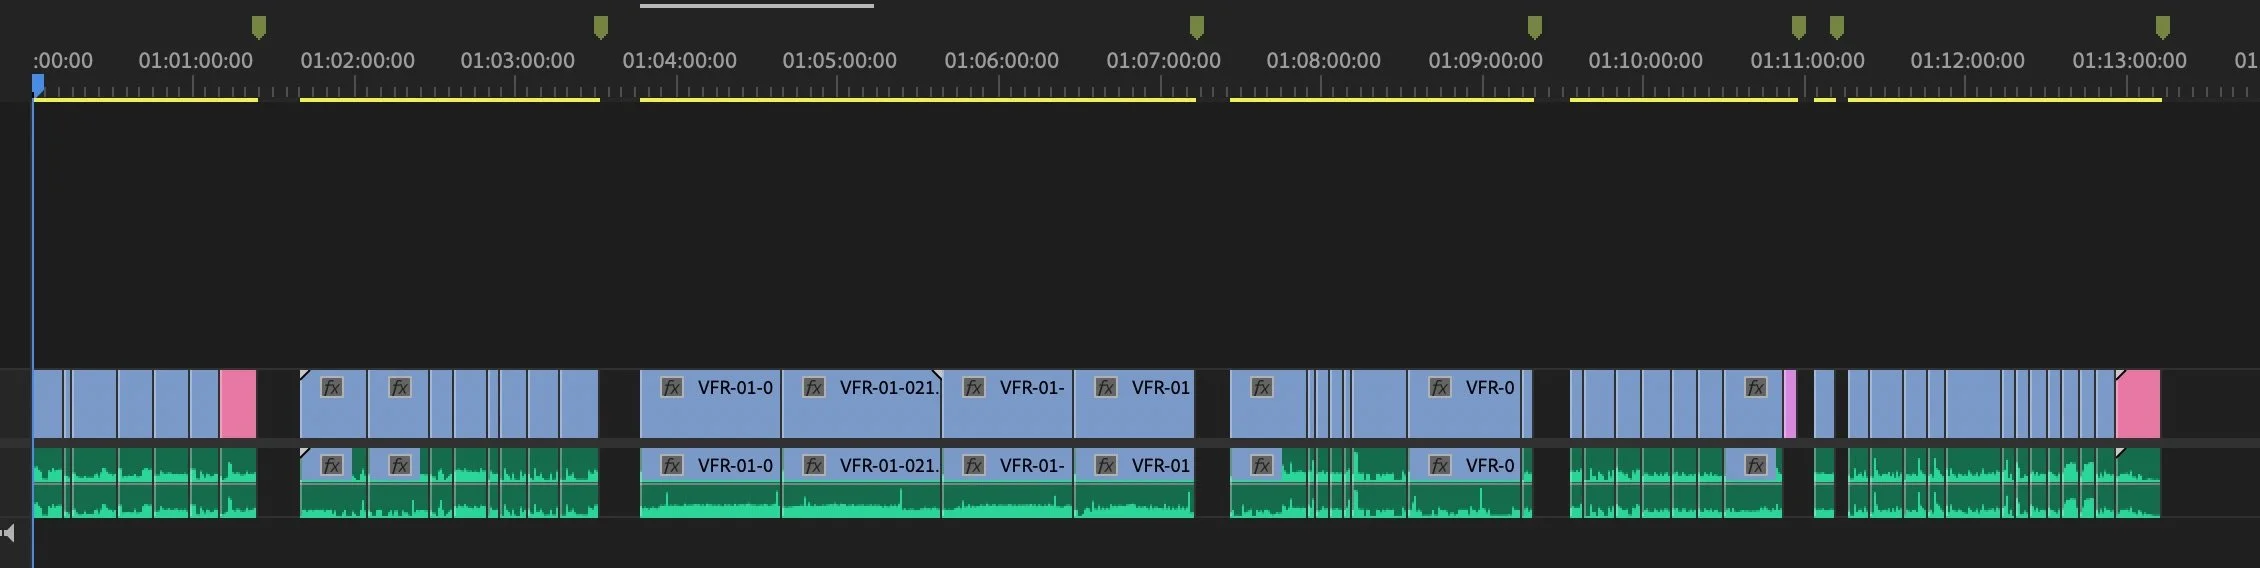
When the amount of footage gets more manageable I sometimes sort footage multiple ways. For example, here I’ve sorted them based on what “act” of the trailer I think my selected shots could be good for. Less complicated moments in the first acts, more flashy ones in the latter ones.
If you want to get really nitty gritty about how I go through all this footage in an efficient way, I made a TikTok video showing precisely how I take a sequence of two hours of clips and turn it into a shorter sequence of organized and selected clips. The video walks you through the exact keyboard shortcuts I use for this very tedious process. This is the sort of exercise that is great for assistant editors to start cutting their teeth on editing software. This is like a kung fu form for video editing that will make you a faster editor.
It takes a lot of practice to make good selects reels. My advice is to not throw away too much at the beginning. You can work in phases by starting with one sequence with all the footage, copying that one, paring down the footage, copying THAT sequence, paring it down further, etc. As you do it more and more, categories and types of shots will naturally emerge as you watch the footage with a fine tooth comb. This will also help you figure out the pillars of the trailer, because looking this closely at the footage will help you realize what parts of the game stand out, and which part are either tedious or very similar to other games.
